WENDY'S WORKSHOP MARCH 2016
THE DRESS CARD TUT
I printed off my worksheets and gathered up the dies and embossing folder
I wanted to use.
Attach foam pads around the cut out oval on the wrong side
and attach the sentiment to it
Matt & layer your paper choice and create the base card using the
TIED TENT TECHNIQUE
The back
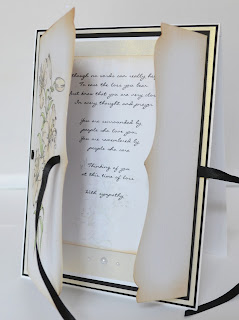
SYMPATHY CARD TUT
I'm using the smallest Go Kreate die from this set.
Print off the worksheets
First score from the non printed end at 5cm & 18cm
Trim down the height of the card to 17.78cm (7inches)
so you have this
Line up the die so it's evenly distributed on a short edge and making
sure that the long edges are OVER the die so as not to
cut into it, repeat for the other end.
So you have this fancy edged front card.
Punch 2 holes as shown above and apply a strip of DST along the back
You'll need approx. 1 metre of ribbon, stick the ribbon to the DST
and thread through the holes as shown above.
Matt and layer the sentiment onto a piece of card and attach
inside the main card.
Create a base card using the TIED TENT TECHNIQUE
and matt and layer your choice of base papers/card
then attach the fancy edged front card to that.
Mount everything onto your base card
and this is the back view


Thanks Wendy for photo.
ReplyDeletehugs margaret